Friday, November 20, 2015

Experiments in the kitchen

My Experiments in the kitchen.

First things - Flours expire because the protein in the flour degrade over time.
http://ask.metafilter.com/52221/What-to-do-with-evil-white-flour

November 17, 2015

CELERY-ONION-SMOKED BACON-CREAM CHEESE BREAD


Today I'm making a celery, onion, smoked bacon and bit of cream cheese bread. Lets see how the experiment goes.
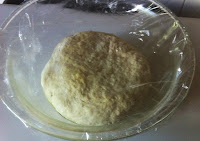
One of the factors I have improved is bring the protein content of expired bread flour+maida+whole wheat flour to ~10% by adding gluten flour.

Rest is mainly going to be experimentation. Also, the yeast is a different one. The Blue Bird yeast is slow to act with large granules and not rising quick enough. However, it did double up in less than 15 minutes. The date is well within expiration of May'16. I am not using the one ordered from amazon which is super reactive.

This put to rest at 1245 hrs. Rest for 45 minutes until doubled.


1330 hrs - it has doubled up indeed and quite soft.


So what's happening right now is at 1545 hrs, I didn't use the rising basket (bread basket)
[ref: http://www.virtuousbread.com/how-to-make-bread/recipies/celery-and-onion-bread/].

Due to that, the bread has expanded flat though rising a bit too. I believe it shall raise only when the dough has reached the edges of the baking tray. I should have put it in some bowl or a basket where it shall have expanded vertically. Now, its just expanding in the easiest direction of gravity - sideways!

I hope it doesn't change the texture of the baked bread. Next time I shall let it rest in an oval bowl, that might help.

Verdict -

The bread tastes very different than what I had in mind. Maybe I wasn't thinking a lot, however, when I had sampled the combination of bacon+onions+chopped celery, it tasted quite delicious. In the bread, it just tasted confusing and lacking any texture from them! The crust though, is a different story. It is the crust you'd like to see in the bread every time it rises, crunchy! I haven't seen such crust ever since I have moved to India. This is quite the crust I was used to seeing in Europe.


Update -

After 2 days now on November 19, I feel my palate has gotten used to the taste of the bread. I'm going to keep trying new recipes and perhaps experiments. What would you be doing? One thing I'm certain of is, I won't be going for bread purchases to the market. My palate would just not accept the baking soda flavours from those commercial dough lumps which are much softer to my liking now. Also this bread tastes deliciously complex with hard cheese and olives. It should be an excellent addition to a hot or even cold lunch with fresh salads and tzatziki.


Thoughts to ponder over -

Does the taste have anything to do with the kind of yeast used? I think the taste has been mixed with so many flavours in it - this led to a confusion. What about the texture? It seems I've forgotten the texture - am I leaving it too long to ferment outside? Next time, I'm going to use lesser yeast. I used about 13.4 grams of yeast. I think I might settle for an even 8 grams for 600 grams of flour.


WHITE BREAD


I put to rest at 1255 hrs. It was expected to rest for 2-3 hours.

1605 hrs
It rose beautifully this time with maida+5% added gluten powder. I have also folded about 30g goat cheese. Lets see how that tastes. Its resting at 1605 in the bread pan.

1834 hrs

The bread looks incredible, but tastes very yeasty! Maybe I've forgotten how breads are supposed to taste after these years of eating commercial baking soda treated breads in India. But we'll see.


Update -

The bread has a crispy crust. The inside of bread is not very soft, but alright to chew on. Once in mouth, it feels like the mouth is doing some effort. I must tweak to ensure the interior remains soft. Does it have anything to do with the oven and the temperatures used?

Keep experimenting.

Tuesday, November 10, 2015

Sesame Seed Bread

November 9, 2015
Monday

I could stand on the shoulders of giants and write majuscule. Eventually, it shall still be stereotyped as bread here!


Or is it? How friends in Belgium and Germany treasure their breads, the quality of the local produce I experienced on the streets of European towns was the depiction of how civilisation was bred over centuries. The only competitor to the eating shall be the ability of citizens to commute using public transport.

I haven't tasted bread since when, my year (2010-11) of stay and exploring the streets in Europe, Hasselt. The smell of fresh bread in front of bakeries and the varieties of cheese was just a very deep-rooted experience. Its only today after what four years, that I have finally baked a bread which has the texture and the heaviness of the European bread. I still experience the same essence - I ate it like I was eating the white bread or the English bread rolls which are comparatively much lighter. Consequently, my stomach is filled to the brim. Well, at least I can write about the good memories I carry now in retrospect. Now, that I have baked it, I wonder what was holding me back. I think it was the perception of us as a nation still developing by and large. Somehow, I couldn't muster up enough motivation and drive to understand that it was much more political game. We as family and perhaps as individuals in North India driven by materialism, have been exposed to some very good quality equipments to explore culinary paths. In the case of baking especially, where if the recipe is followed precisely, the intuitiveness of it is quite simple and straightforward - all that remains is how we can express in presentation. I think savoury is much more elaborate, and requires much varied ingredients.


What I have found out is understanding of technique in baking as in other forms of cooking, helps relieve the tension of the basic failures like the dough not rising or the bread not becoming chewy enough. For that, the attention must be paid on the quality of the ingredients and of course the cooking time.

Okay, down to the business end of it.

To understand better about the action of yeast, follow the links below:

Yeast's crucial roles in bread making

Functions of yeast in baking

Yeast

Sesame Seed Bread

Ingredients

Yeast - 2 tsps

Luke warm water - 300 ml

Plain flour - 200g

Whole wheat flour - 200g

Salt - 2 tsps

Sugar - 1/2 tsps

Toasted Sesame seeds - 70g

Untoasted (fresh) sesame seeds - 5g


Procedure

1. To the sugar, add 125 ml water and stir it. When dissolved, add the yeast. This is to activate the yeast. Leave it for 10 minutes on the side.

2. In a separate bowl, combine the two flours with salt. Make a well into the middle.

3. Add the yeast mixture and the water into the well. Stir in the water and finally knead the dough using some flour.

4. Cover it with a plastic bag, and leave it to rise. In about 1.5-2 hours, it should have doubled.

5. Once doubled, remove it and punch it. Knead the sesame seeds into it, folding the dough multiple times.

6. Grease a round 9 inch baking tin. Divide the dough into 16 parts and arrange in the round pan. Cover it with plastic again, and let it rest till it rises to the rim height (approximately 1.5 hours).


7. Remove the plastic sheet. Brush it with some milk and sprinkle the fresh sesame seeds. Put it in oven at 220 deg. C for 15 minutes, and then reduce it to 180-190 deg. C for 30 minutes.


8. Remove the bread from tin, and place on a rack. Let it cool for 30 minutes.


Comments

1. For me, the texture is a bit heavier. I love the taste of the bread, absolutely smashing. For lighter texture, I shall try putting slightly more yeast (I think 2.5 tsp), and let it sit in warm temperature (approximately 40 deg. C) for about 1.5-2 hours. This should change the texture.

2. For the lining the tin, I used unsalted butter which gave it a crispy crust. For a softer crust, the lining of the tin could be done with milk or salted pasteurised butter. In addition, adding a bit of milk to the dough also makes the final product much more chewy. However, this is supposed to be a very solid bread.

Enjoy baking!


Monday, November 2, 2015

[Success] Everything carries an expiration date (recipes - Pizza dough, short bread)

November 2, 2015
Monday

There are days when we fail. Due to the undying will, we pick ourselves. Sometimes, the failure persists and then eventually, we find a solution. We as humans, have been trained to be problem solvers.

Culturally, as Indians we grow on spicy food. Baking is something which does not come to us as an intuitive notion - we learn though. We adapt, we persist and with enough passion, I think we can develop and preserve the skill in the kitchen.

The last time I tried doing, I was deflated not just metaphorically but the pizza dough actually deflated... if it ever left the baking surface. Today, Monday a new day, a new week and I have managed to rekindle the successful habit. I guess its also with the mindset. The days when it just doesn't work out, I questioned whether I actually belonged here. Eventually, after reading through the possible problems, I did manage to figure out a problem with my dough - Expired Yeast!

Believe or not, but everything in kitchen carry an expiration date. Make sure to check for ingredients whenever cooking with baking ingredients. I'd also recommend from now on to ensure the quality of ingredients for spicy-blended foods. Needless to say, experimenting in the kitchen is the best habit, just not for direct servings please. Try experimenting with the skill set and from my personal experience, you'd start developing an intuition for the local ingredients and flavours.

Trip through the experimenting lane - pizza dough


Even before I begin, the pizza did manage to melt in my mouth. However, the dough could further rise if yeast is cured properly. Yeast generally takes effect in tepid/lukewarm water in about 15 minutes. At this time, its ready to be mixed with in the dough.


In my second attempt, after the failure on the first on October 26-2015, today I let the yeast sit in warm water for about 8 minutes. The stickiness which imparts the chewiness to the dough returned. However, the dough did not double in size. The reason I figured out was again as suggested, the yeast needs to get activated in warm water for about 15 mins. Because of the lesser time, the yeast wasn't fully activated. Due to this, the dough could not fully rise.


In my third attempt, I corrected the error and let the yeast sit and get activated for about 12-14 minutes. The result was the doubling up of the yeast-water mixture, which hopefully shall give it the increased size. Lets hope for tomorrow. I'd update it then.

The pizza dough recipe I'm following is this -
White flour - 200 g
Salt - 1/2 tsp
Yeast (Active dry yeast) - 1 tsp
Lukewarm water - 120 ml
Sugar - 1/2 tsp
Olive oil - 1 tsp

In the water, mix the sugar and stir until mixed. Stir in the yeast and let it sit for about 10-15 minutes. You'd see the yeast getting activated and a foamy mixture rising. After 15 minutes, stir in the white flour and start folding sideways from one end with your hands. Once mixed thoroughly, transfer to a flat base where you can knead it using some flour. Take a bowl, line it with olive oil, let the dough sit there at room temperature for about 45 minutes - 1 hour, till the dough has doubled up. Sometimes depending on the low temperature, it may take a while. Take the doubled up dough out, give it another knead and follow the usual pizza flattening and layering with the toppings as per your taste.

There's another form of yeast which is quick action. That doesn't need to get activated and can be used just like the baking powder which does not need any activation as well.

To check whether the yeast is functional, follow this link -
http://redstaryeast.com/yeast-baking-lessons/yeast-shelf-life-storage/yeast-freshness-test/


Short bread


Ingredients

Unsalted butter - 150 g
Caster sugar - 100 g
Plain flour - 180 g
Rice flour - 55 g
Baking powder - 1/4 tsp
Salt - 1/8 tsp


Instructions -


1. Grease an 8 inch cake tin.
2. With electric mixer, cream the butter and sugar until smooth and very light. Mix all the flours along with salt and baking powder.
3. Give a gentle knead through hands to the entire mixture, so the dough binds together and not fragmented.
4. Spread it in the tin with the hands. I later pricked with a fork just for some decoration and of course the baking to take place evenly inside.
5. Bake in the over for about 50 minutes at 160 C.
6. Follow it up with 5 minutes at 200 C. This shall give it a golden crust.

Voila, enjoy!


Additional

I also managed to make crispy garlic Hakka noodles spiced up with green/red chilli sauce, condiments and a Lot of Vegetables.